
Installation Notice
Installation Environment
|
Item |
Criterion |
|
Place |
Room |
|
Temperature |
-10℃~+40℃ |
|
Relative Humidity |
5~95%(Not icing) |
|
Environment |
Being not exposed in sunshine and the environment should haveno dust,no burning gas,no steam,no water etc.There is no temperature changed sharply. |
|
Space |
There is at least 300~500mm space at both sides |
Installation Methods:
The plating rectifier should be installed flatly on the material that can be heat-resistant and in space can emit heat easily.
Because the plating rectifier will produce heat while it is working,so the cool air is necessary to make sure the surrounding temperature is less than the rating value.
While several power supplies work together,the partition boards must be installed between to power supplies to decrease the heat effect.
It is depicted as follows:
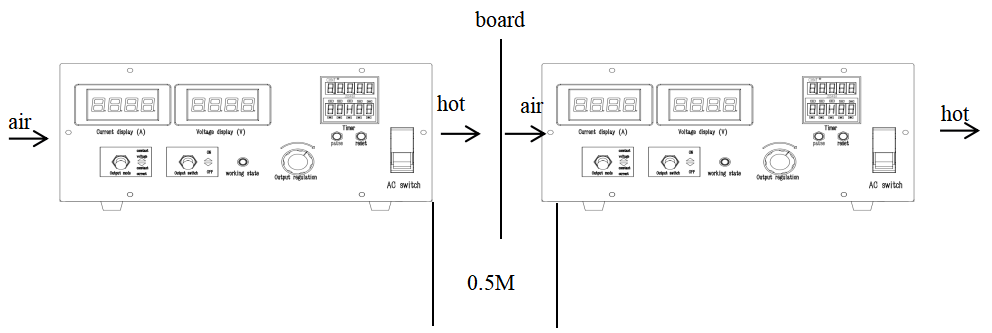
Make sure there is no any sundries such as various fibers,paper,wooden pieces into the plating rectifier,or else fire will occur.
Notice:
Any of the power cables can not neglect connecting,or the machine may be unable to work or mangle.
While installing the output copper,the worker must make sure the copper surface is slippery in order to have good electronic conduction performance.It is should be fixed by copper bolt or stainless steel bolt.
The ground eng must have good grounding performance to assure no accidents happen.
The positive/negative poles must be connected correctly.
Start-up
Checking all switches before turn on the plating rectifier.
When the power switch in on ,the status indication light will green-light ,which means power standby after that ,turn the ON/OFF switch to ON position ,the instrument starts to work .
Installment
Step1 connect 3 phase AC input
Air&Water Cooling devices(take 12V 6000A as an example)
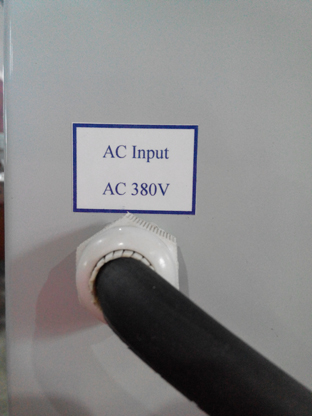
After the device placed, firstly,connect AC wire (three wires 380V) with power wires (power supply wire should be installed an air circuit breakers to conveniently maintain equipment. Air circuit breaker specifications shall not be less than the input switch on the device specifications) . AC line load should retain a certain amount of surplus, power supply voltage must be within the range specified in the device used. Cooling device must be turned on and with water pumps, pump head should be more than 15 meters to ensure water flow, users should also decontaminated water if condition allows. Inlet and outlet device actually marked to prevail.If many devices to share a main water inlet pipe, each inlet water pipe should be installed a valve for easily control water flows and cooling water can be turned off when devices were maintained.
Air Cooling Devices(take 12V 1000A as an example)
After the device placed, firstly AC line (second line of 220V, three line 380V) and power lines (220V or 380V) connection; please pay attention that if input voltage is 220V, live wire and zero wire should be consistent with wires of devices (usually red for fireWire, black for zero wire); power supply wire should be installed an air circuit breakers to conveniently
Step2 connect DC output
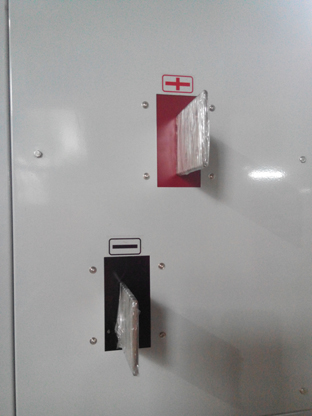
Connect correspondly the positive (red) and negative (black) buzz bar with plating bath positive and negative.The devices must be strictly grounding (if the factory have no earth terminal, 1~2 meter an iron rod driven into the ground as the earth terminal). Each connection must be firm to reduce contact resistance.
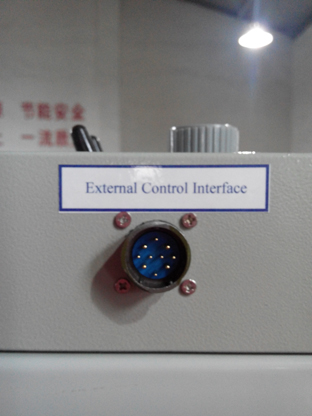
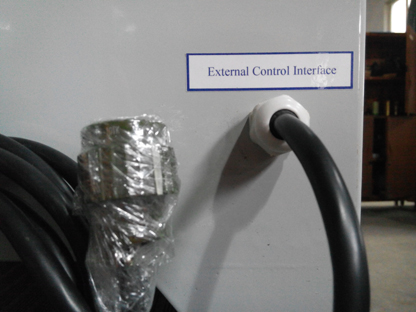
Step3 connect remote control box(if no remote control box, skip this step)
Connect remote control box and remote control wire. Connector should be sealed by waterproof tape.
Device commissioning
Starting commissioning after finishing installment. Firstly,check all the interfaces, to make sure all the interfaces are well connected,no short circuit on the output port and no lack phase on input port. For the water cooling power supply, opening the inlet valve , starting the pump, checking the cooling water pipes’ connections to avoid leaking, seepage. If the leakage, seepage happened, the power supply should be deal with immediately. Normally, when disconnected the load, the two output ports should have resistance of a few ohms.
Secondly close the output switch . site the output adjustment knob to the minimum. Open the input switch. If digital display table is on, the device has entered standby mode. Open the output switch on no-load condition and site the cc/cv switch to the cc state and adjust the output adjustment knob slowly. The output voltage meter display 0 - rated voltage, in this condition the power supply in normal situation.
Thirdly, at this point you can disconnect the output switch and adjust the output adjustment knob to the minimum , take the load site the cc/cv switch to the condition you needed then open the output switch, adjust the current and voltage to the value you needed. The device enters the normal working condition.
Common Trouble
| Phenomenon | Reason | Solution |
| After starting up, no output and no voltage and current
Digital table is not bright
|
Phase or neutral wire is not connected, or the breaker is damaged | Connect the power line, replace the breaker |
| display disorder ,the output voltage can not be adjusted ( no load )
|
Display meter is damaged, remote control line unconnected | Replace the display table, check the cable |
| Load capacity decreased,work status light flashes | AC power supply abnormal, lack phase, output rectifier partially damaged | Restore power,replace damaged parts |
| Work status light flashes,no output,after resetting.working normally
|
Overheating protection | Check the cooling system(Fans and Waterway) |
| Have voltage display,but no current | Load poor connection | Check the Load connection |
| Display table header is displayed as "0" no output, adjust the "Output adjustment knob" no reaction | Output switch is damaged, the device internal fault | Replace the output switch.
Contact the manufacturer |
Post time: Sep-08-2023


